Thursday, 28 May 2015

Me Made May 2015 Week 4

Nearly there with Me Made May 2015. 

It's repeat outfits now with the occasional find from the bottom of the drawer. 

This week I have realised that my three favourite items are my denim dress made with light weight Merchant and Mills denim, a striped jersey dress and my various versions of my MIY Collection Shrug. 


Friday, 22 May 2015

Round up of Me Made May weeks 2 and 3 #mmmay15

Wow, May is flying by! Only one week left of Me Made May. 

This is what I wore in week two


 and in week three


As part of my Me Made May Pledge here I said that I planned to make some underwear. So far I have managed to make one pair of knickers and purchase the bra pattern. I'm hoping to find some time in half term to get the bra started...


Thursday, 7 May 2015

Me Made May 2015 - Week 1

We're one week into May already and I haven't really started on the knickers and bra part of my Me Made May pledge. I better get my sew on.

I have been posting my outfits daily on instagram @craftyandcake but thought I'd do a little round up here too.

So this is what my first week of May looked like...


...now what to wear next week, hmmm

Maybe something I get finished today as I'm sewing, sewing, sewing! What are you up to today?

Wednesday, 6 May 2015

Re-creating retro Sindy, Barbie and Tressy Doll Clothes

I've just found this post in my drafts that I started over a year ago... It just needed a photo of the jacket but I forgot to take one and then publish this post! I had my photo taken today for today's Me Made May 2015 outfit so here it is!

The original first post - 30 Jan 2014

Sindy (on the left) is mine from the early 1980's and Barbie (on the right) is from Toy Story 3 and belongs to Ruby. We have a difference in opinion over who is prettier, Ruby thinks Barbie and I think Sindy. We do agree on how lovely their new clothes are that came from Emmaus a couple of weeks ago. 


My friend and I sat on the floor and searched through a box of clothes selecting the ones I liked the best. In the end I cam home with some lovely retro Sindy and Barbie Outfits. Also in the box were some Tressy Doll Clothes. Tressy Dolls were made in the UK in the early 1960's and my Mum used to have one. 

When Ruby got home from school we tried all of the outfits on her dolls and they did a fashion show :) I felt rather envious of Sindy's shift dress and the grey Tressy dress. So armed with my new skills from my City and Guild's course at MIY Workshop and my Winifred Aldrich Pattern Cutting book I am going to re-create some of the outfits in my size. 

Now which one first?


The New Post - 6 May 2015

I decided to start with the Tressy Doll Suit. I don't have much need for a suit so I decided to use the suit as inspiration and make a spring jacket.


I started by drafting the basic 'flat' overgarment and 'flat' kimono blocks from Metric Pattern Cutting for Women's Wear by Winifred Aldrich and adjusted block at the neckline and side seam.

I made a toile in some lovely! fabric remnants I had in the fabric stash and made some amendments to the neckline on the pattern. 

Then I went fabric shopping at Ditto Fabrics :) 
I don't think I could wear that much tartan so I chose a black and taupe speckled heavy cotton for the main coat. A cotton zebra print for the collar (that I will be able to remove and change if I don't like it) and a pale green lining.


And here it is, my finished jacket! 


Well worn and loved. I definitely need to make another one in a different colour.


Tuesday, 5 May 2015

Singer Chain Stitch Sewing Machine

This little Singer was a charity shop find from about 5 years ago. 

It's a Children's Chainstitch Sewing Machine, I have no idea how old it is, but it works!

It has been used occasionally by my little man between the ages of 4 and 7, mostly when I had my machine out. 

For the last couple of years it has sat in his wardrobe being eyed up by his sister.

This weekend he finally said she could have it!


So on Sunday when I was trying to finish a kimono cardigan (it still isn't finished!) she decided that she wanted to sew too. Out came the machine and scraps of Merchant and Mills denim (she is spoilt!).


There are now scraps of sewing, straight stitch on top and chain on the bottom. The chains don't always catch each other and it has a habit of undoing when you take it off the machine. But she had fun making "blankets for her toys". 

If you want to see the machine in action, check out the video on my instagram @dressmakerssocial


She now has her mind set on a dress for Bunnywunny and I'm off to draft a pattern for it. I don't think I will ever finish my kimono at this rate!

Wednesday, 29 April 2015

Me Made May 2015

I'm taking part in "Me Made May 2015" organised by So, Zo... What Do You Know? Check out her blog here.

This is my pledge...
I, Emma of craftyandcake.blogspot.co.uk and dressmakerssocial.blogspot.co.uk, sign up as a participant of Me-Made-May '15. I endeavour to continue to wear at least one me made item of clothing each day for the duration of May 2015. In addition I will stop putting off making and wearing the knickers pattern I have had for too long and may even attempt to start the craftsy bra making course I bought six months ago!

I wear at least one me made garment most days so I needed to add a challenging bit. 

I enrolled on this bra making course six months ago and I have two knickers patterns that I received as birthday gifts. I haven't got round to making any of them yet so my challenge is to make and wear them this May.

If you would like to join in too, all you have to do is click here

I'll me posting updates on my progress on instagram as @craftyandcake on twitter as @dressmakersbton and here Facebook using the #mmmay15


Wednesday, 22 April 2015

#sewsolidarity #whomademyclothes #fashrev

I’ll be honest, two years ago when I heard on the news that the Rana Plaza Factory in Bangladesh had collapsed I thought “that’s sad” as I often do with disasters reported on the news that are so far away. It wasn’t until recently after reading this blogpost by English Girl at Home that I started thinking about who makes the clothes I buy, mostly, for my two children and occasionally for myself as the majority of items in my wardrobe are home sewn.


My kids have grown up wearing lots of H&M clothes, mostly because I like them, but also because they are within our budget. It's only since I started sewing my own clothes that I have come to appreciate the amount time, care and attention needed to produce a garment and that to sell a garment so cheaply must mean that the person who made it must get paid very little for the work they have done.


So, thanks to an Instagram post about #sewsolidarity, Traid’s challenge to home sewers to raise awareness for the anniversary of the Rana Plaza disaster, my awareness of the topic has increased and my eyes have been opened reading about the conditions in which our clothes are made. One I found particulary interesting was this video by on suicide rates amongst cotton farmers. It would be easy to continue ignoring these stories and not think about where some high street clothes come from but I am glad that my eyes have been opened and I now think about “who made the clothes I buy for myself and my children?” and I have made a little pledge to myself, to be more mindful when shopping, to research where the clothes are made and continue to educate myself about who makes my clothes.


In memory of those that died in the Rana Plaza Collapse and to help raise awareness of the conditions in garment factories that produce clothes for the UK high street I am taking part in two awareness challenges.


First is Traid’s #sewsolidarity. Traid are asking home sewists to re-purpose a garment purchased from one of the shops who used the Rana Plaza factory to extend the garment’s life. I am re-fashioning two H&M garments from my son’s wardrobe that no-longer fit him, a plaid shirt and long sleeve T-shirt, into a dress for my daughter. If you would like to join in with the challenge, more details can be found here.


Here are the before and after pictures...


The second challenge is Fashion Revolution’s #whomademyclothes On Friday 24th April 2015. You take a selfie wearing an item of clothing inside out, post the photo on social media, tag the brand and ask the question #whomademyclothes.


There are lots of events on around the world, I’m hoping to pop along to my local one being hosted by Fashion Revolution Brighton at the MyHotel bar at 6pm on Friday April 24th. Details are on their Facebook page.

Have you ever thought about who make’s your clothes before? If not I'd check out Fashion Revolution Brighton and take a look at who makes your clothes. It’s interesting reading, eye opening, thought provoking and it certainly made me think about who make’s my clothes.

Tuesday, 11 November 2014

Minecraft Party

Our little Man recently turned 9 so we had a Minecraft Party to celebrate...


We started off with invites made using this minecraft block printable to make envelope/boxes and I downloaded the minecraft font from here to type up the invites that I printed in grass block colours.


Next up was the party favours. I bought green t-shirts from Amazon and using a Creeper template I found online, similar to this one, I fabric painted creeper faces on the front. 


Jacob made some Hama Bead Minecraft squares. I love how when ironed they look pixelated. There is Steve, a pig and an Ender Man. I found the template here.


We kept the decorations quite simple as the lounge was also decorated for Hallowe'en. I used the font I had downloaded to make a Happy Birthday banner and drew creeper and zombie faces on green balloons. For the party bags, I bought green paper bags and found a template online to print the creeper faces directly onto the bags. Most of the guests wore their creeper t-shirts for the party. 


Just before we changed into costumes ready for trick or treating, the candles were blown out and the cake was cut....

Two Minecraft blocks in one cake :)


Saturday, 8 November 2014

Book Launch for...The Beginners Guide to Dressmaking - Wendy Ward

I've just got home from a lovely evening at the book launch for Wendy Ward's "The Beginners Guide to Dressmaking" at MIY Workshop. As the evening is over I can finally post pictures of the cakes!


A couple of weeks ago my fellow student Croianna text me asking if I would like to make a cake of Wendy's book with her for the book launch. So a few days ago we got together and had fun decorating a cake.

Here it is... Croianna made the clothes and I did the lettering.


With the left over sponge I made a pair of scissors because which dressmaker/seamstress doesn't have a slight obsession with scissors?!


My little assistant Ruby made me some pins for the fondant pin cushion whilst I added gold powder to the bolt on the scissors.


 And here she is... the lady herself... Wendy Ward, cutting her cake!


Congratulations on your awesome book Wendy and everyone else... go buy a copy and learn to how to sew your own clothes!


Tuesday, 4 November 2014

Christmas Needle Felting Workshop - 21st November 2014 in Brighton

Since I last posted I have joined the fundraising team at Jacob's cub group and we've decided to run  few crafty events that I am very excited about!

I have known Emma Herian from Sew Recycled for years from having stalls next to her at craft fairs and I have long admired her gorgeous needle felted animals and other creations.

So I am very excited to announce that Emma has agreed to run her Christmas Needle Felting Workshop at the 44th Brighton Scout Hut on Friday 21st November 2014.


Tickets are a absolute bargain price of £25 for 3 hours of crafting fun making approx. 2-3 baubles. All materials and non-alcoholic refreshments are included. 
We are having a BYO on the evening if you would like to enjoy a glass a wine.

So come along, tell your friends and join us for an evening of crafting.
Email me @craftyandcake@gmail.com to book a.s.a.p. as spaces are limited.

I can't wait to make one of these cute Christmas puds!


Hope to see you there!


Wednesday, 30 July 2014

Rainbow Ice Cream Cake

A combination of a late night blog reading session about ice cream cakes, an early morning request from Ruby to bake cakes and Jacob's friend coming for tea today resulted in this...

Rainbow Ice Cream Cake

The blog I was reading last night (I can't remember which one during my bit of summer night insomnia) showed a 2 ingredient ice cream cake using shop bought ice cream and angel cake.

I've not made angel cake before so a quick search later we were adapting a Martha Stewart recipe by splitting the mix into 4 and adding pastel food colouring. We baked the mix in cupcake cases and once they were cooked they were set aside to cool. 


Ruby went off to the theatre for a friend's birthday treat and left Jacob and I to assemble the cake.
We bought a tub of Cornish Ice Cream and left it out to melt a bit. We then uncased the cupcakes and squished them into a springform tin (thank you Kay for lending us one).


Next the ice cream was smeared on top and the tin was popped in the freezer to set. To finish it off we shared out the Smarties (eating the brown ones as we went) and decorated the top.


Yum!


Tuesday, 29 July 2014

We Made a Water Blob

When Ruby and I saw this last week we both instantly wanted to make one.


So today we dug out some plastic sheeting that has been lying around for years, duck taped the edges, filled it with water and added some pink food colouring.


Ours didn't turn out quite like the Pinterest pictures and it was leaking before it had finished filling but the kids had fun for a couple of hours on and off.


I'd make one again because Jacob said it was (word of the summer) EPIC!

Wednesday, 26 February 2014

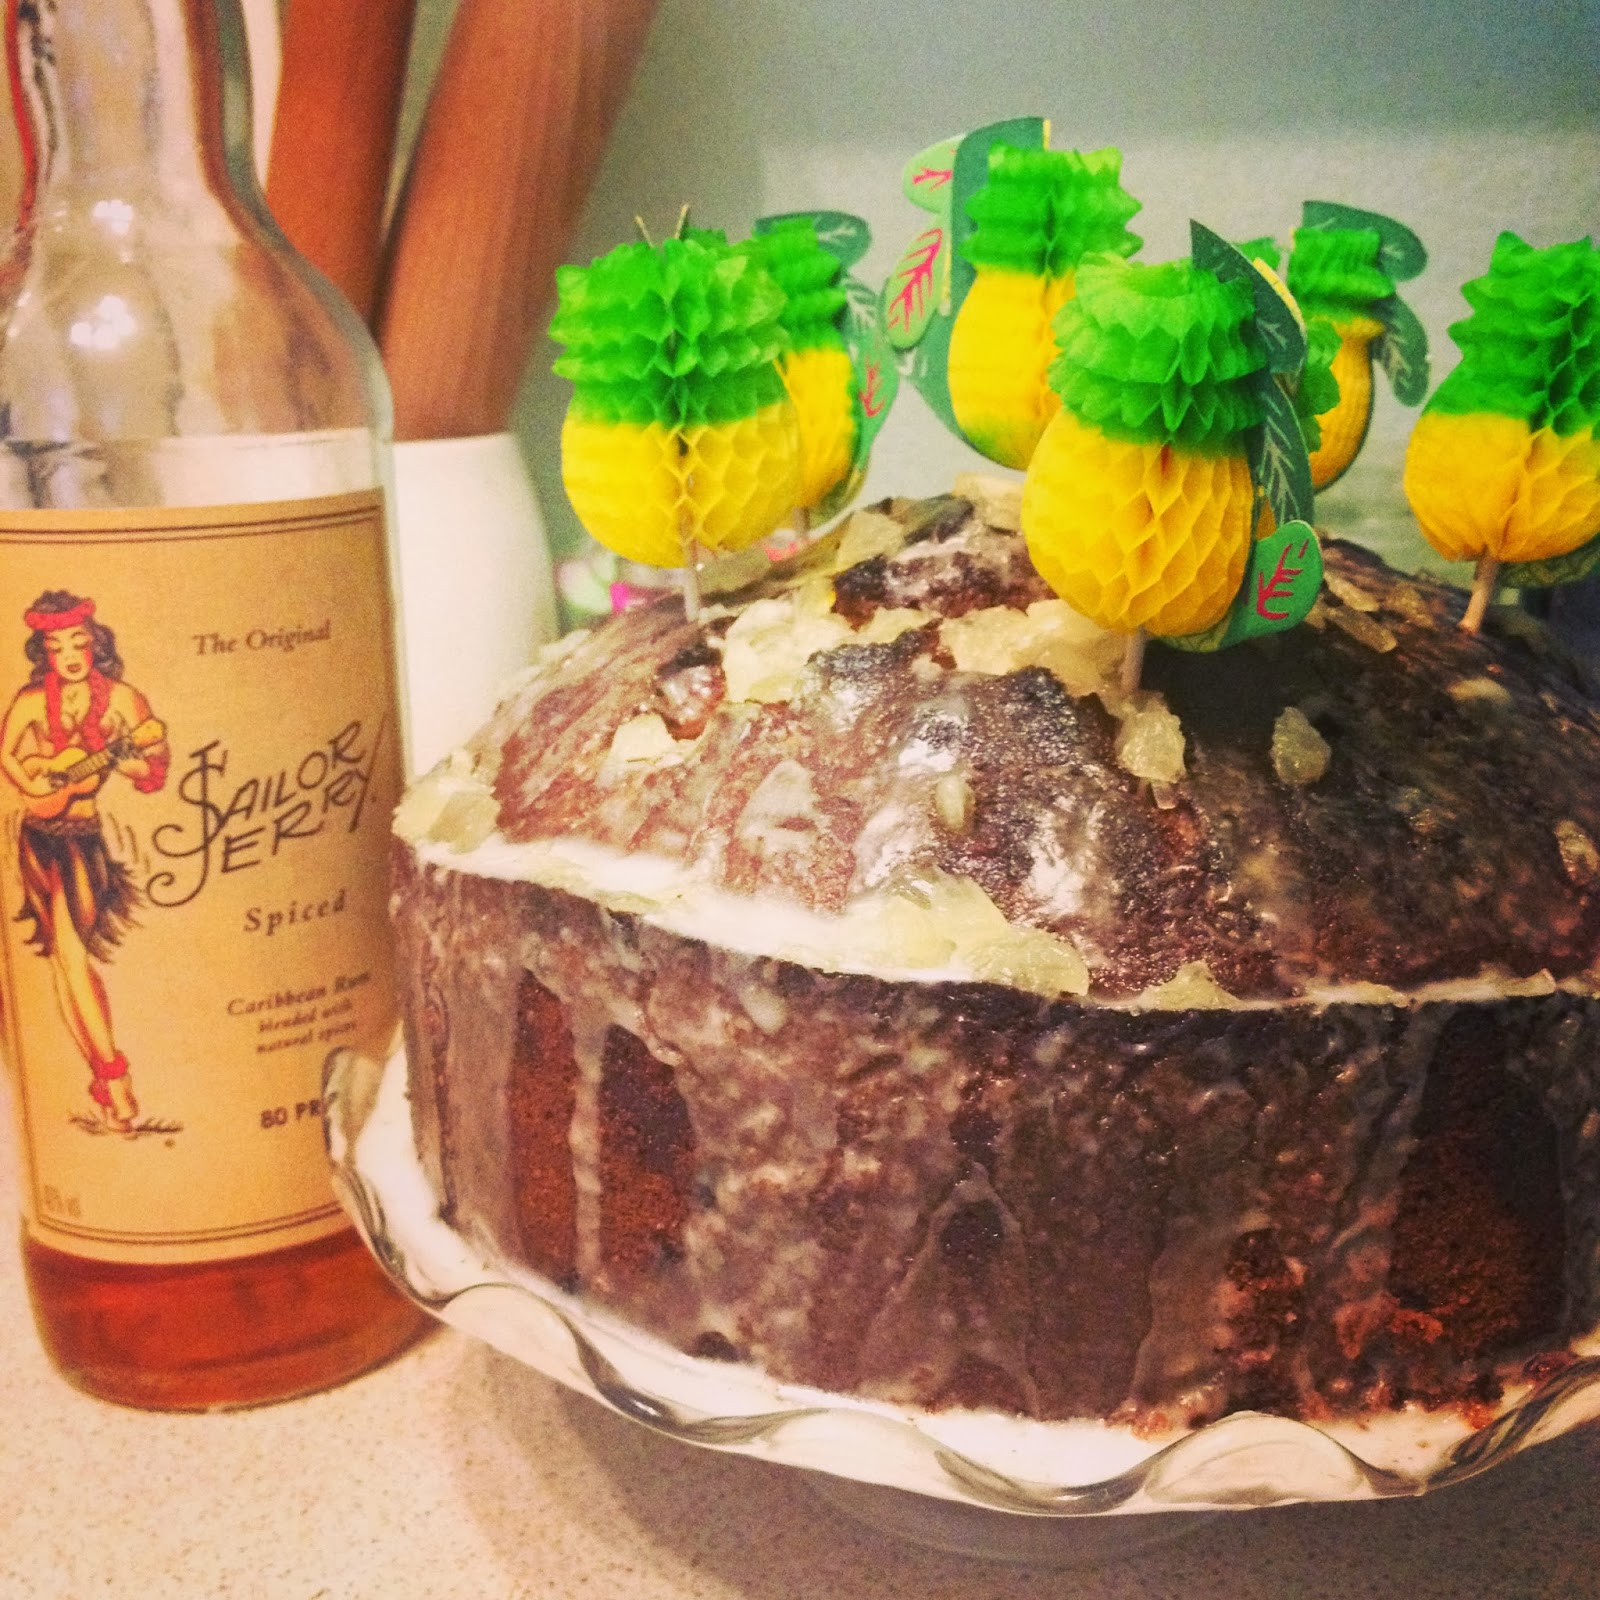
Sailor Jerry's Rum, Raisin and Ginger Cake with Pineapple Icing

Yesterday was Chris's birthday and I baked him a cake. It was a very yummy Sailor Jerry's Rum, raisin, ginger and pineapple drizzle cake.

I found a Rum and Ginger Cake recipe here and used it as the basis for my recipe.


To recreate the cake you will need:

Cake:
1 cup of butter
2 cups of light muscovado sugar
3 cups of self raising flour
1/2 tsp salt
4 eggs
2/3 cup of milk
1/3 cup of Sailor Jerry's Spiced Rum
1/2 cup of crystallised ginger (chopped into small pieces)
1/2 cup of raisins

Before Icing:
25ml Sailor Jerry's Spiced Rum
25ml pineapple juice

Icing:
150g of icing sugar
Fresh pineapple juice
Slice of fresh pineapple, (i used tinned but think that fresh would have been better)

A deep 20cm tin or 2 shallow 20cm tins

Pre-heat the oven to 175c or 350f and grease and line your tin/s.

Cream the butter and sugar until light and fluffy. 
Sift together the flour and salt and set aside.
Combine the milk and rum together and set aside. 
Lightly beat eggs and add to the creamed butter and sugar with a spoonful of the flour and whisk until combined.
Reduce the speed on the mixer and alternate adding the flour and milk and rum until you have a smooth batter.
Stir in the raisins and the crystallised ginger.
Pour into the prepared tin/s and bake for 75mins until the cake bounces back when lightly pressed and a skewer inserted into the middle comes out clean. 

Leave to cool.

Skewer the cake a few times. 
Mix together the pineapple juice and rum and pour over the cake.

For the icing:
Chop a small piece of pineapple into tiny pieces.
Sift the icing sugar into a bowl, add a little pineapple juice at a time and mix to a double cream consistency. 
Stir in the pineapple pieces and drizzle over the cake.


To finish the cake off I added some paper pineapples that I bought from Tiger.


And a lot of candles!

You can count the candles to see how old he is. We did remove half of the candles as we were worried that the combination of the paper pineapples and the rum would start a fire.


Friday, 21 February 2014

Sailor Jerry Spiced Rum Marmalade

Chris made this a couple of weeks ago and it is so good!


Here is his recipe...

Sailor Jerry Spiced Rum Marmalade

Ingredients:
1kg seville oranges
2 limes
1.5 kg golden granulated sugar
500g light muscovado sugar
1/2 tsp black treacle
75ml Sailor Jerry spiced rum

Equipment:
Muslin
Sieve
String
Large pan

Instructions:
Place a sieve over your pan. Line the sieve with a large square of muslin.
Cut the oranges in half and squeeze out the juice through the muslin. Keep squeezing until all the pith and pips have come away from the skin and end up in the muslin. Set the orange skin aside.
Continue until all the oranges are juiced.
Squeeze the juice from the lime. Discard the skin
Pull up the sides of the muslin to form a bag for the pith and pips. Tie it with a piece of string.
Add 2.5 litres of water to the juice already in the pan. Place the muslin bag in with the juice in the pan.
Return to the orange skin. Shred them as thickly as you like. Place the shredded orange skins in with the juice.
Place the pan on the stove. Bring to the boil and simmer for 1 - 2 hours until the skin is soft and the liquid has reduced by about half.
Leave to cool overnight...
...Next day
Remove the muslin bag and squeeze it until all the juice has come out. You’ll probably start to get a thick jelly squeezing out of the bag as well. This is a good thing!
Measure the juice and jelly. If it’s less than 1.25 litres top it up with more water. If it’s more try boiling some more of the water off.
Place a couple of plates in the fridge or freezer.
Add both the sugars and the treacle to the juice and stir until it has dissolved. You can speed this up by warming the sugar first in a low oven if you want to.
Bring the marmalade to a rolling boil and boil for 15 minutes stirring from time to time to stop it catching.
Take one of your cold plates and drip a little of the marmalade onto it. Give it a minute and then try pushing it. If it wrinkles a little then you’re there. If not keep boiling for another five minutes and try again until it wrinkles.
Once it’s ready remove from the heat and add the Sailor Jerry.
Leave it half an hour to cool a little, ladle into sterilised jars and seal. You’ll get between 5 and 7 jars.
It tastes great fresh but is much better after a couple of months.


So, that's it. Normally this quantity lasts us 12 months but he should have made more because this batch is being eaten at an alarming speed! 

Oh and I couldn't resist making a little grass skirt for the jar :)


Related Posts Plugin for WordPress, Blogger...