Showing posts with label Made with love by Mum. Show all posts

Friday, 6 December 2013

Crafty Catch Up

I have been a bit quiet on here over the summer/autumn but I have still been busy sewing and making...

I made a bear hat for Ruby.


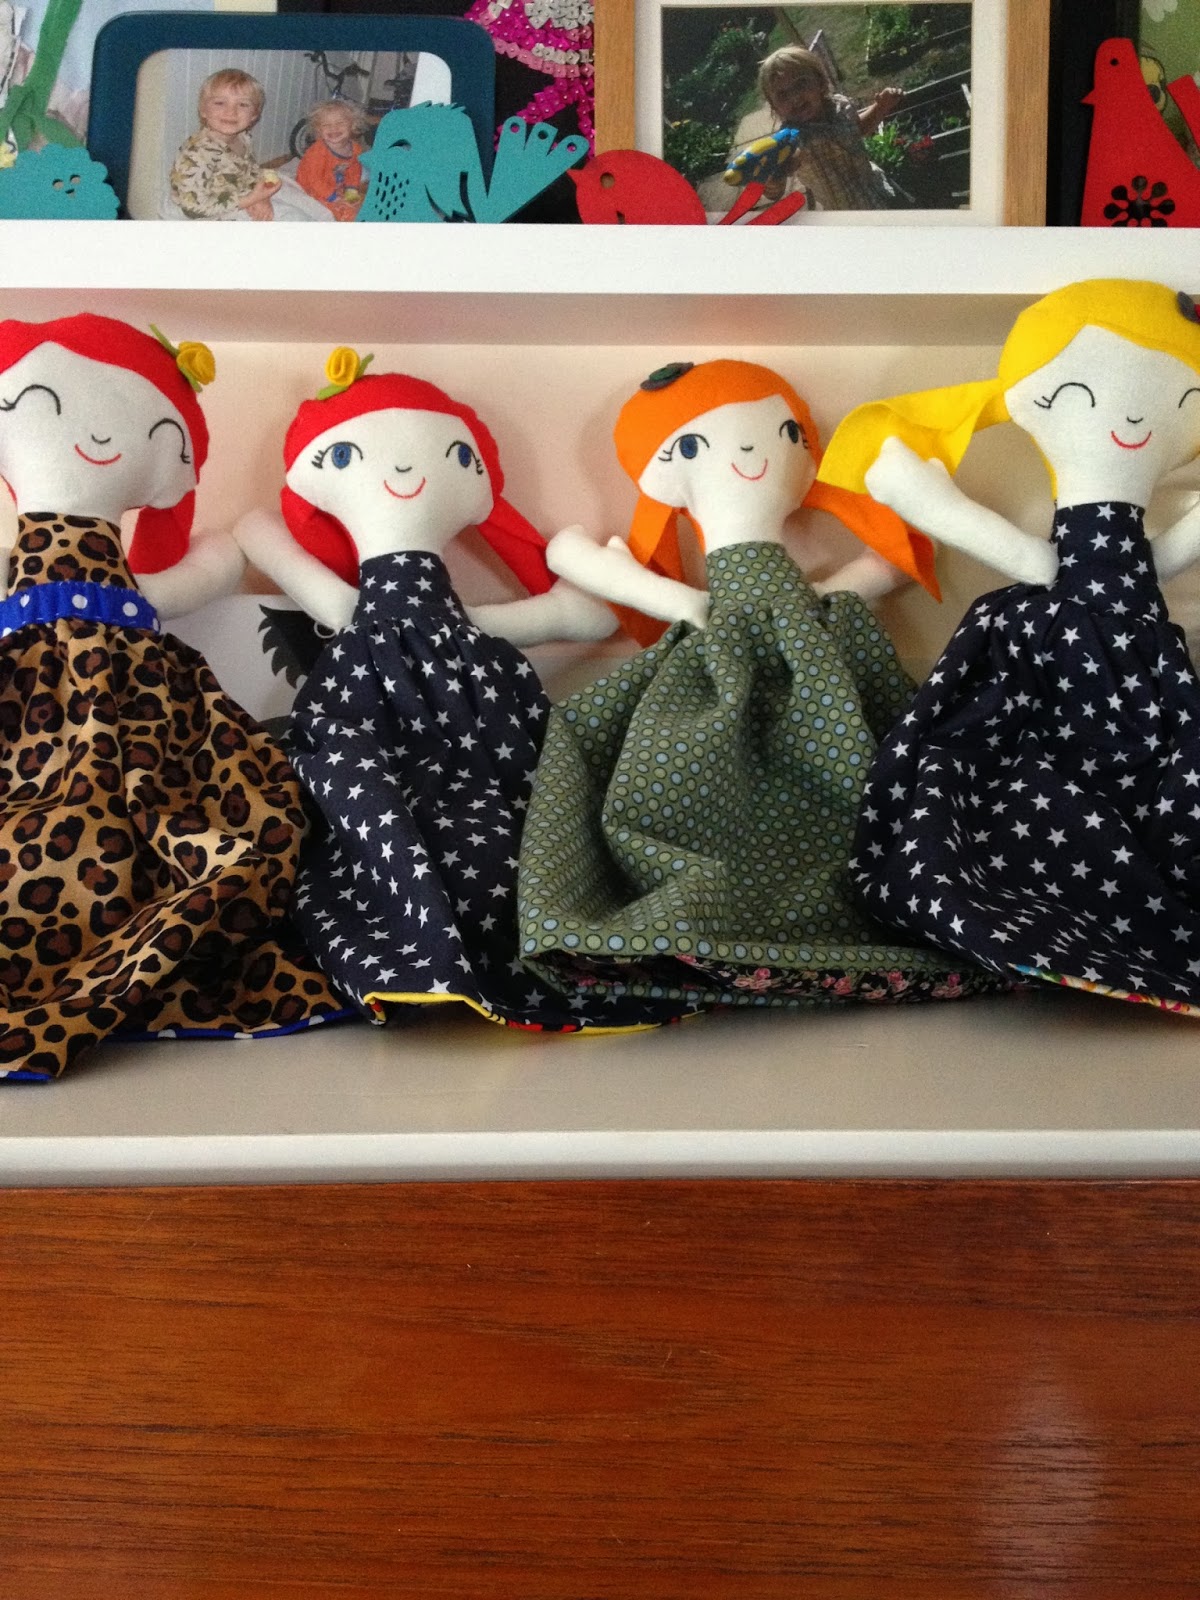
And these little ladies have been taking up most of my time. The pattern for Topsy Turvy Dollies was in Mollie Makes in the summer and I think I have made 10 of them now. They take ages but they are fun to make and each one is cuter than the last. I think my favourite one is the one Ruby gave as a gift because she had a little bear hat :) that I forgot to photograph in Ruby's haste to wrap her up.


I've also been attending a One Piece Garment Pattern Cutting course at MIY Workshop and draft a pattern for my Christmas dress. Photo's to follow when it's finished.

Wendy is great and I have learnt loads from her. Check out her classes and learn something new too!
I have also helped her make some Suffolk Puffs for her Christmas Window. As of Saturday 7th December you will be able to vote for your favourite small business window on the council's Facebook page. I'll post the link when I eventually find it. Vote for her!!


 I've also started a little xmas decorating myself, here are some sneak peeks!


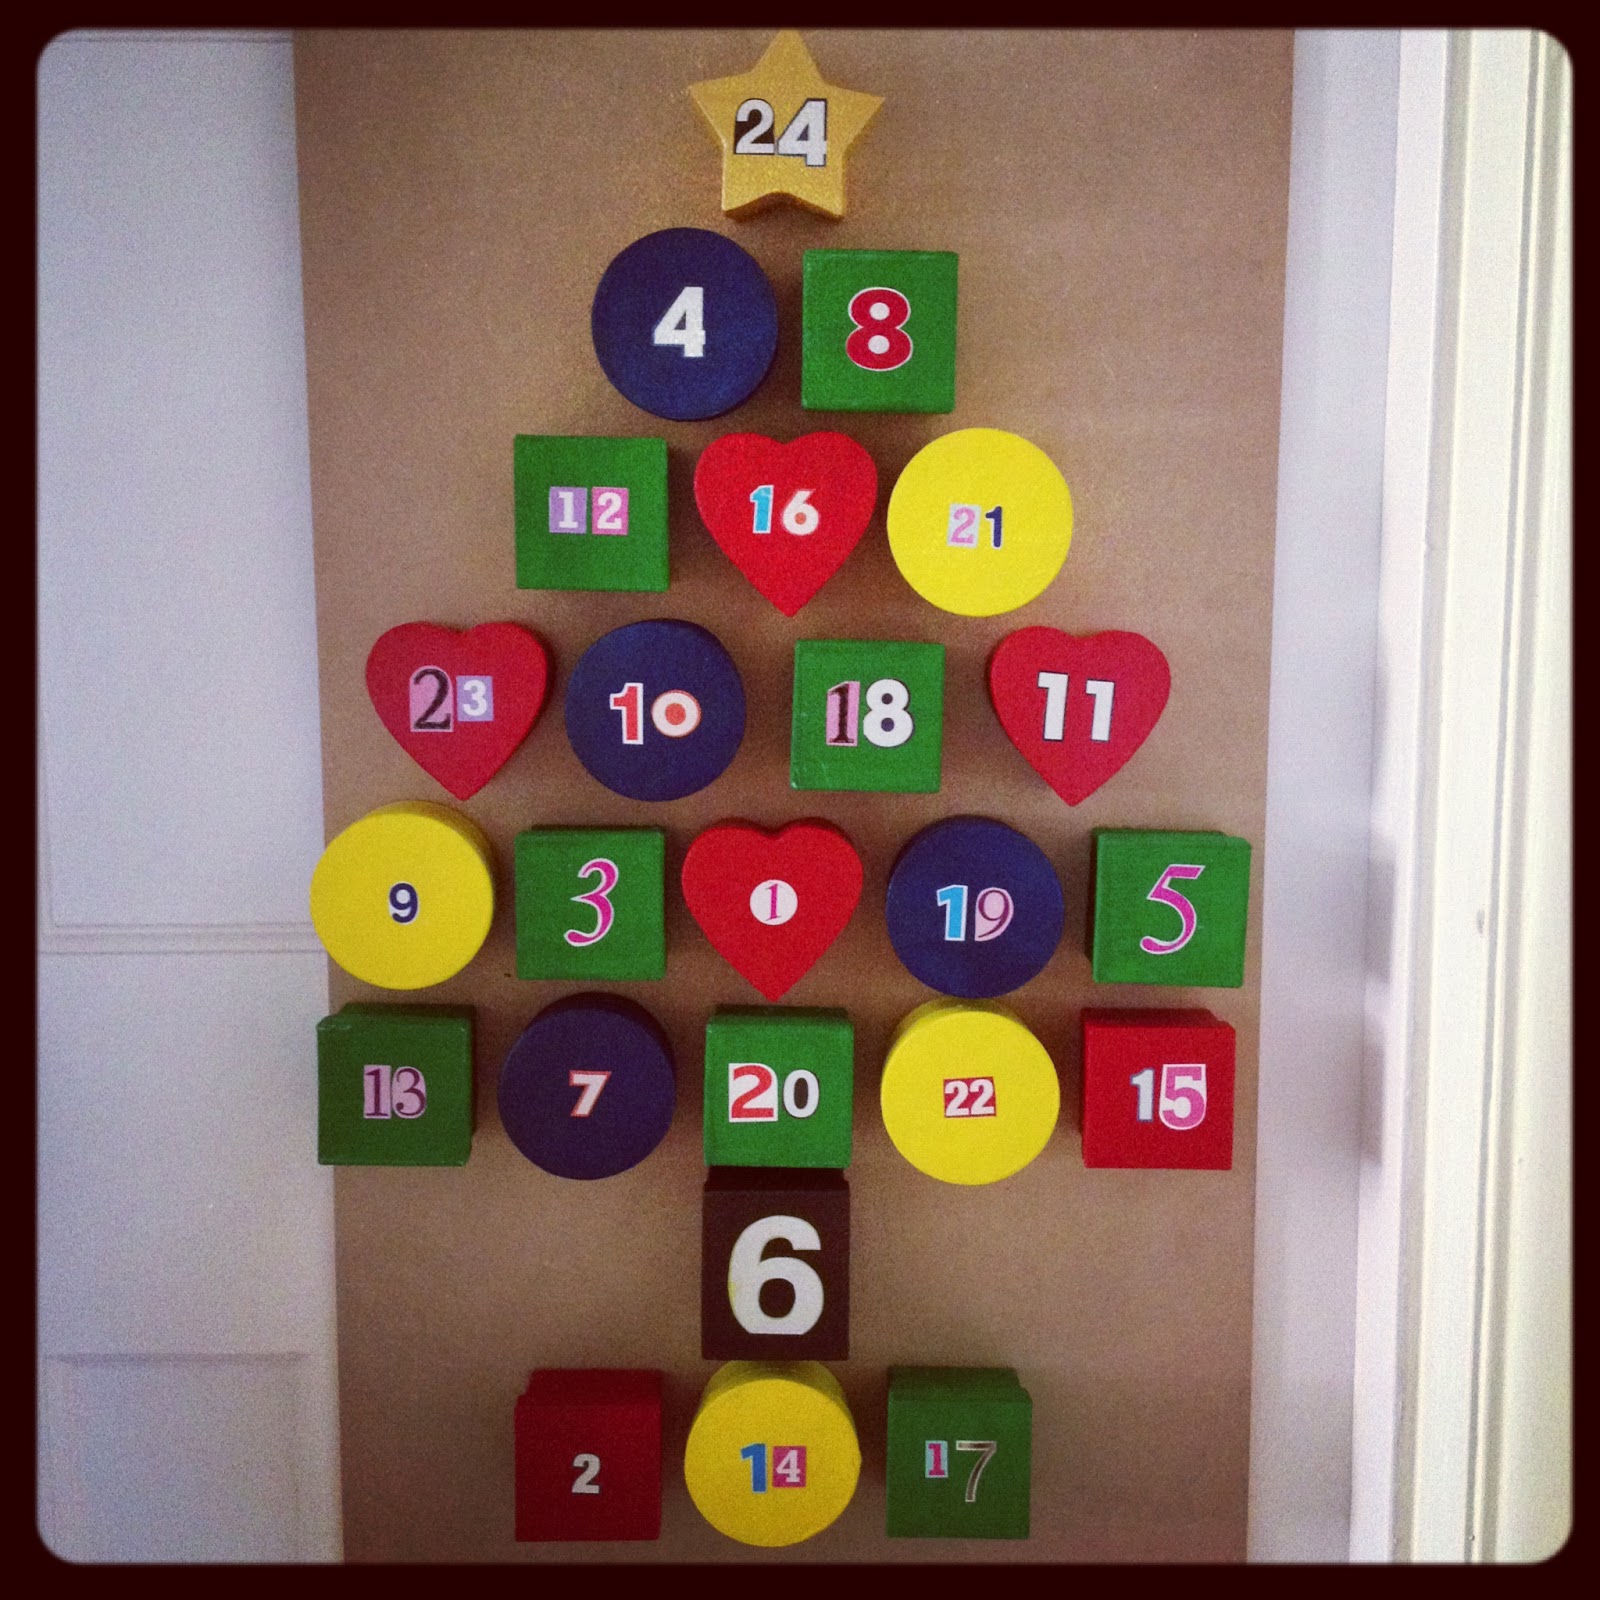
The advent calendar I made a few years ago is up and filled with chocolates and Christmas jokes. They are classics!


I'll leave you with todays joke...

Why does Santa need a big umbrella?

Because of all the rain-deer!

Friday, 22 March 2013

Flashback Friday - Birthday Cakes

I was at my friends house the other day and she showed me some photo albums from when she was little and pointed out that there was always a photo of the birthday cake. In the photo albums at my mum's house there is always a birthday cake photo too. My Mum always made our birthday cakes and one of my earliest memories is of looking through the books like this choosing my birthday cakes. I still love looking through these books and now have some of my own that Ruby loves to look at. Here she is planning her 7th Birthday cake. With three years to go she is starting her planning early!


Writing this post made me wonder where the tradition of birthday cake comes from. A quick look at Wikipedia and I discovered that birthday cakes have been part of a western birthday tradition for nearly 250 years. That is a lot of cake! In our house the cake is something that is taken for granted and an important ritual of a birthday celebration. A couple of times I have said not to bother with a cake for me, with my birthday being in early January and I feel a bit caked out after Christmas and Ruby's birthday, but my kids have been in uproar and insist on a cake. It seems it is as important as cards and gifts.

For me the best bit of a kids party is the cake. Not all Mums bake the cakes themselves and that's great because I love the Chocolate caterpillar supermarket cake and the cake tray bakes. I make and decorate cakes for my kids because I love doing it but I do sometimes feel like it's a chore, especially when I am trying to ice a cake at 1am on New Years Eve/Day through blurry eyes.

Do you buy or bake? What did your Mum do for your birthday cakes? Are there photo's of cakes in your childhood/children's photo albums?

These are some of my favourites...

Jacob's 1st Birthday
Jacob's 4th Birthday Cake
Jacob's 5th Birthday Cake

Jacob's 7th Birthday
Rainbow cake with autumnal colours.
 
Ruby's Cakes
2nd Birthday
Two cakes for the 3rd Birthday. That is the trouble with a family party one day and a friends party another. 

4th Birthday
p.s. Thank you Kay Fletcher for inspiring this post! x

RDJN32AYTKHR

Thursday, 7 March 2013

World Book Day - Dressing Up

Jacob's school dressed up today for World Book Day. 

Can you guess who he is?


Gandalf from The Hobbit!

Wearing a travelling cape made by me earlier this year and a wadding beard that I wasn't sure would last the day but it did!
Apparently the expression on his face is his Gandalf face?!

Did you or your kids do anything special for World Book Day? 

Tuesday, 26 February 2013

Tutorial - Parrot Wings

It was back to school yesterday after the half term holiday. I vaguely remember reading a newsletter before we headed off to Disneyland about Jacob needing to dress up as an animal during the first week back. I read the letter properly on Sunday and realised that a costume was needed not just a set of clothes in an animal colour. It had to be an animal from the African plains, the rainforest or the desert. 

I thought that the tiger tail and mask that I'd made for him when he was three would do but oh no, Jacob had decided that he wanted to be a parrot! I know I could have said "no, you will be a tiger" but he might not wear fancy dress I make him for much longer (when do boys grow out of that?) so I said "ok, I will make you some parrot wings" (Daddy's birthday present which is already a day late can wait one more day, sorry Chris).

I did a quick google image search and found this parrot...

...and a quick sketch and a measure of Jacob later and I had my plan. 


Here is how I made Jacob's Red and Green Macaw Wings!
I used:
Paper
Pencil
Tape measure
Fabric in your parrot colours, I used Honeycomb Parc from Fabricland
125cm of bias binding in one of your parrot colours
Cotton
Scissors
Pins
Sewing machine or needle if you are hand stitching
Safety pin
Felt scraps
Two buttons

I wanted the wings to look like the parrot was in flight. So I got Jacob to stand with his arms out at the side and measured from wrist to wrist across his back, which was 91cm.

I made my pattern pieces using a large roll of paper (you could use a roll of brown paper or cheap gift wrap). I drew one half of the wings and placed the paper on the fold of the fabric to get a symmetrical pair of wings.

In total I had; one large blue piece, one green feather piece, one red feather piece, a blue piece for extra feathers at the bottom, four light blue single feathers, one large light blue feather piece and three single red feathers (not in the photo below).

I bought some honeycomb parc which comes in lots of bright colours, is really cheap and doesn't fray. I also like the way the honeycomb pattern in it gives a textured effect for the feathers.

I then cut out the paper pattern pieces using normal scissors. I folded the fabric and placed the centre edge of the pattern on the fold, pinned it to the fabric and cut them out using fabric scissors. 

Handy Hint
Don't use fabric scissors on anything other than fabric. I ruined my Mums pinking shears cutting paper with them when I was little!


Next I assembled the wings, layering each set of feathers and pinned them into place. 


After a quick tea break I set my sewing machine to zig zag and stitched all of the pieces together, leaving the dark blue feathers unstitched at the bottom to create movement.

To finish them off I took the bias binding and folded it over the top edge of the wings (leaving approx. 15cm at each end for Jacob to hold on to) and stitched it into place. I then tied the 15cm bits into loops to go over his thumb.

The wings looked great but the outfit was "missing" something. So, I made a parrot head bandana using a rectangle of the red parc, some felt for a beak and a couple of buttons.

First I made sure that the rectangle of red parc would fit round my head (as my model was at school). Using pieces of grey and cream felt I cut out two slightly curved triangles, one slightly bigger than the other and basted them together, I marked the centre of the bottom edge of the rectangle and stitched the felt into place. I cut out a couple of almond shapes for the eyes and stitched them on with a button in the centre of each.

One little Red and Green Macaw ready for school. Squawk!


Monday, 25 February 2013

Memory Picture


A couple of weeks ago I made a list of all the projects that I wanted to start. I haven't got round to as much as I had hoped but this weekend I managed to tick another item off the list. 

Frame Ruby's Jumper - tick!

Every couple of months I have a sort through the kids clothes and remove the items that no-longer fit. I'm left with two piles. One pile that I am happy to pass on to friends for their kids and a pile of 'special' bits that I can't bear to see another child in. 

I have made memory bunting for a couple of Mums using their daughters baby clothes and I thought that this made a really lovely keepsake. I've also heard of memory quilts that other Mums have made for their children. Over the years I have kept a stack of Jacob's T-shirts for a memory project that I am still to get round to. 

Just before Christmas I tried to throw away a gorgeous red cord pinafore dress because it had an irreparable tear in the back. Ruby went mad and wouldn't let me get rid of it because she liked the cat. So I decided to frame it. I took the glass out of the frame so that the pocket didn't get squashed. It now sits on her dressing table, Ruby has a nice picture to look at and each time I see it I remember my three year old toddler wearing it. 

A couple of weeks ago I realised that this cat top was too small so once it had been through the wash I popped it in a cheap frame from Tiger. Now all I need to do is hang it on her wall. Can you see a theme developing? Ruby likes Cats.
Do you hold on to your kids clothes as keepsakes? Do they sit in a box like some of mine do or have you made them into fun stuff?

Saturday, 23 February 2013

Made with love by Mum


Chris bought me these labels for Christmas 2011 to put inside things I make for our kids.

I have my Mum to thank for my craftiness. There are lots of photo's of me as a baby wearing sundresses made by my Mum and as I got older she made my dancing presentation dresses too. I now make outfits for Ruby and I like to think that maybe one day she will make clothes for her children.

Here are a couple of recent outfits that I have made for her. It seems her very pink bedroom makes everything I photograph in it come out with a pink tinge.

The dresses are variations of a burdastyle pattern. I found this pattern quite difficult to follow as is based on european sizes and the instructions are a bit confusing. But they turned out alright in the end. 


Denim dress with pink binding edges and ice cream iron-ons by Julia Rothman.


This one opens at the front and has little bunny rabbit buttons and pink binding. I love pink and orange together. It reminds me on my primary school summer dress.


Every little girl needs a fake fur cape. The pattern is Burda Kids 9475, the fabrics are a cream fake fur and I lined it with cream fleece for warmth. All are from Fabricland on Western Road, Brighton. The cape is fastened using a popper and finished with a pink bow. It's so cute and she loves it.


Related Posts Plugin for WordPress, Blogger...