Tuesday 30 April 2013

Sprinkle Polka Dot and Rainbow Marble Cake Tutorial - Part 2 Polka Dot Cake

Polka Dot Cake, Let's go!

I used this post by Once Upon a Pedestal for inspiration.

First you need to make the cake balls. I tried lots of different ways of making the balls here. In the end  I used a Popcake Maker as it gave the best dots. 
Instead of using the recommended mix I used a standard cake mix:
100g butter/marg, 100g caster sugar, 2 eggs, 5ml of vanilla extract 100g self raising flour (cake making method in Part 1) so that their consistency matched the main cake. This quantity made approx. 48 balls.
I split the mix into 4 batches and added the colouring and baked them for the recommend time in the instructions leaflet. 


When they were cooked they looked like this, So colourful!

I made the dots/balls the week before the party so popped them in the freezer until I needed them. If you are going to use them straight away wait till they are completely cooled before adding them to the cake.

Now it is time to make the cake.

Pre-heat your oven, grease and line your tin.

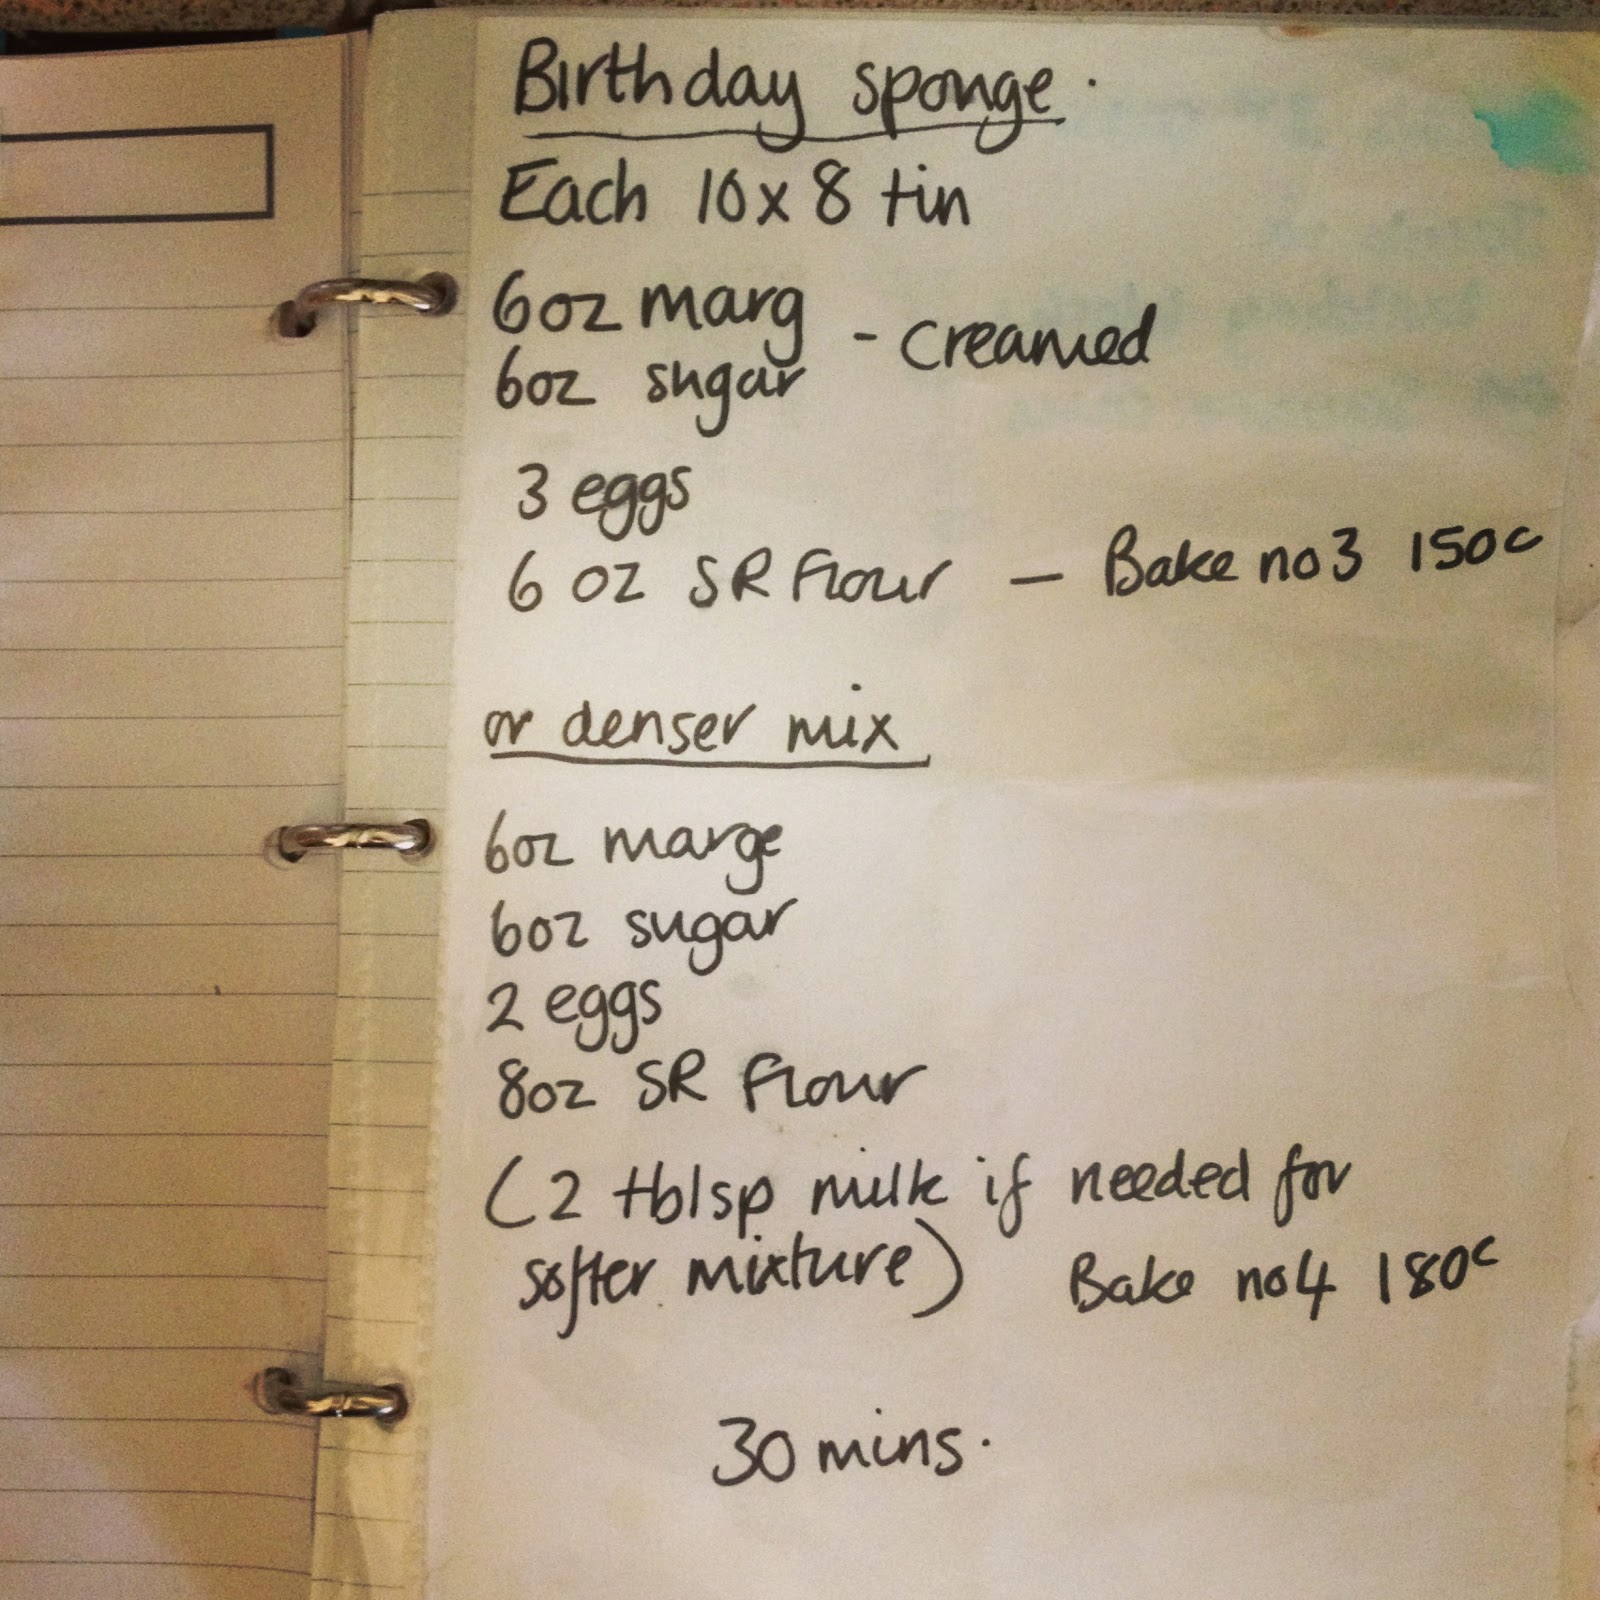
Mix up a batch of vanilla cake mix to the required quantity for your cake tin. You can use the recipe in Part 1 of this tutorial and this guide for quantity. Or use a shop bought cake mix and bake to their instructions.

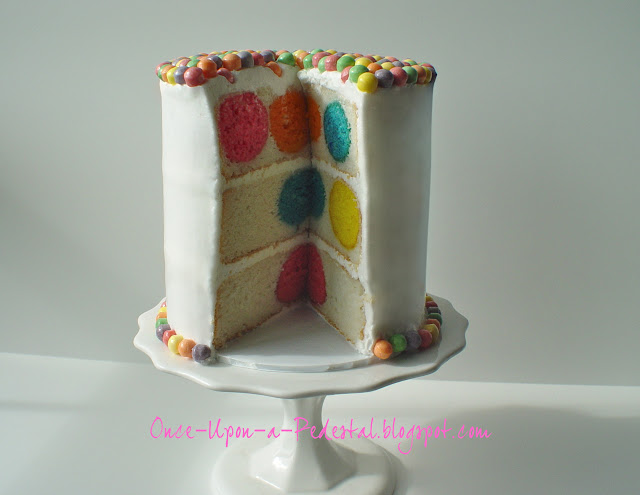
Add a small layer of white cake mix to the base of your tin, spreading to the edges of the tin. Split the number of dots between your tins if you are doing more than one layer.

Cover the dots with the remaining cake mix and bake for the required amount of time depending on your tin.


When it's cooked allow to cool before assembling. 

Add your filling of choice and cover in your favourtite frosting. I used white chocolate swiss mergingue using this really detailed tutorial by Sweetapolita.


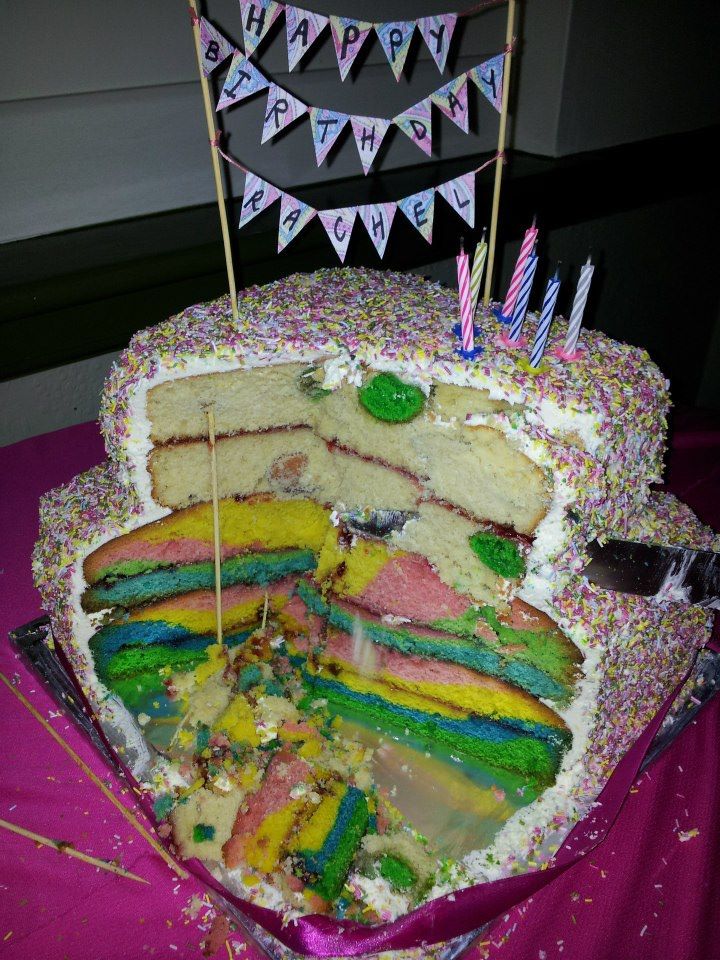
And then covered it in sprinkles!


To assemble the two tiers. I made two 30x30cm cakes for the bottom cake and added seedless raspberry jam between the layers. The polka dot cake went on top, again with the raspberry jam inbetween the layers. I secured the top tier to the bottom one using bamboo skewers cut to the same depth as the cake and the applied a first coat of buttercream as a crumb coat. This stops the cake crumbs coming off during the top coat and making it look yucky. I then sprinkled the sugar strands on, for the side I had to pack them on using the palm of my hand. To finish off I attached a pretty pink ribbon and made some super cute cake bunting.


For the cake bunting I used some of the party invitation paper and cut out diamonds that I folded in half to make triangle flags. I used some embroidery thread and glued the triangles together to hold them onto the string. I then cut little notches out of the bamboo kebab sticks so that the thread didn't slip when I tied it on.


This cake was so much fun to make. If you want to give it a go for yourself and have any questions give me a shout!


Sprinkle Polka Dot and Rainbow Marble Cake Tutorial - Part 1 Rainbow Marble Cake

Here it is the biggest cake I have ever made. A massive 2 tier polka dot and rainbow sprinkle cake. I think in the end it weighed 7kg!

On the outside 6 packets of sugar strands (it could have done with 8 but I ran out of time to pop back to the shop).


The special surprise inside!


Rainbows and Polka Dots!

If you would like to make one too here is how!

I used this recipe and the denser mix recipe as it needed to be sturdy!


Recipe in grams for a 25cmx20cm tin:
150g butter/marg (I use stork)
150g caster sugar
2 medium eggs (120g) lightly beaten
200g self raising flour
2 tablespoons (30ml) of milk if needed to soften mix
1 teaspoon (5ml)
Food colourings of your choice
180c / gas mark 4 
for 30 mins

You probably don't need to make such a massive cake, but you can use the above recipe and method below to make the cake to any size you want to.

Depending on the size of your tin calculate how much mix you will need. I found this really good guide for tin sizes, cake mixture and icing quantities here.

Bottom Tier Rainbow Marble Cake

Grease and line your tins and pre-heat the oven to 180c (because my cake was so large I dropped the heat to 170c and increased the cooking time)

Weigh out your ingredients. In a bowl (or electric mixer bowl) cream the butter and sugar until it is light in colour. Add the vanilla. Add the lightly beaten eggs and continue to whisk (by hand or electric mixer) to combine. If your mix starts to curdle had a desert spoon of sifted flour and continue to whisk. Turn off whisk and sift in flour a little at a time. Using a metal spoon fold the flour in using a figure of 8 movement taking care not to knock out the air you have just whisked in with the egg. If the mixture is too stiff to stir gently add the milk and combine.

Take 4 bowls (or however many colours you want to use) and divide the mixture equally. To each bowl of mixture add the food colourings, the more you use the stronger the colour will be.


Start with your darkest colour and empty the mix into the middle of the tin.


Give the tin a gentle shake to get the mix into the corners and pop it in the oven.
When it comes out it will look something like this!


You can then add your filling of choice (I used seedless raspberry jam) and cover with buttercream. 
I used white chocolate swiss meringue buttercream and used this fantastic tutorial on Sweetapolita. I could spend hours looking at the lovely creations on this site!

If you want to add a polka dot cake on top my tutorial for that is coming up next!


Monday 29 April 2013

Rachel's Party

I woke up on Saturday morning singing "Get the party started" by Pink because the day of Rachel's birthday party had finally come. Week's worth of planning, crafty shopping trips and making sessions were about to come to fruition. 

In four hours we turned The Ladies Mile Pub Function Room from this....


 ....Into what Chris later described as Martha Stewarts migraine! It looked awesome.

There is so much to show you....


Bunting, ruffled streamers, huge paper lanterns, tissue paper pom pons, fairy and disco lights, spotty garlands, doily bunting, balloons, the lot! (Tutorials and links to follow later this week!)

Guests were invited to bring a record for the DJ to put on. We danced to Blur, Betty Boo and the B52's. 


Tables were covered in pink and yellow honeycomb parc from Fabricland, night lights in jam jars and bowls of crisps and sweets.


There was also a little bit of toilet graffiti!


Oh and a cake!
24 eggs, 10 egg whites, a lot of flour, butter, sugar, food colouring and 6 jars of sugar strands. It was huge and had a very special surprise inside!


Hope you had a Fab time Rachel!


Friday 19 April 2013

Polka Dot Cake Practise

I'm having a bit of a Heston Blumenthal day today and I don't want to see a cake pop again!

I have been practising for the cake I am making for my friend Rachel's 30th! birthday party next week.

She has asked for a polka dot cake.


So for the last couple of days I have been experimenting (hence, a Heston day) with different ways of making the spots. 

I've been using the method on Once Upon a Pedestal as a guide. I don't own a cake pop pan or maker so I tried it out using mini cupcakes.

The colours are amazing but the dots aren't round enough.


I'm not a cake pop fan. The only time I have made cake pops was last Christmas when I made snowmen using crumbed cake and buttercream rolled into balls before being covered in white chocolate. They were too sickly and not something that I plan to make too often so I didn't want to buy a cake pop tin.

Luckily Rachel was able to borrow a Popcake Maker from her friend and Ruby and I have spent the morning making approx. 100 cake dots with different types of mix.


The first batch came out like pebbles so I added more mix for the yellow ones and there was a spillage.


Five batches later and the dots are ready for the freezer.


And the ones that were a bit wonky got covered with chocolate and sprinkles by Ruby.


I've sampled to many though and I'm not sure I can manage another. Cake Pop Anyone?

Pop back after the 27th to see how Rachel's cake turns out!

Tuesday 16 April 2013

Crafty Catch Up

The kids went back to school/nursery yesterday and although there was part of me that didn't want them to go the other part was jumping up and down with excitement! Two days all to myself! I avoided the cleaning and decided to get on with and finish up some craft projects....

Just in time for spring! I made myself a scarf and some wrist warmers using my knitting loom.


Ruby now has a sun and cloud to go with her rainbow. I used yellow and white stickers to create a scallop effect on the sun and cloud and buttons for the raindrop earrings.


I'm half way through this year and last year's FatMamaSlim's photo a day April challenge. Today's theme is "my favourite colour" Yellow! I walked past this lovely forsythia this morning and it made me smile. We used to have a massive one in our old front garden that I miss. 


 A sneak peek at a little felt project I started today!


Have you made anything this week?
Related Posts Plugin for WordPress, Blogger...